MEET THE SOUS CHEF!

I DO ALL THE BAKING, CHARLEY KEEPS ME COMPANY AND LICKS UP MY MESSES.

Sunday, December 19, 2010

IT MATTERS NOT WHAT SOMEONE IS BORN, BUT WHAT THEY GROW TO BE.

It was my bosses birthday last week, and I knew I wanted to bake him a cake. He and I share a minor (major) love for Harry Potter, so I got to thinking.

WHAT IF.....we all had Horcruxes? Not like "He who must not be named" in the sense of evil...but little seemingly worthless items that represented something near and dear to us. Tiny insignificant significant symbols that could be a 'pocket collection' of major things in our lives. I was onto something. WHAT IF I found out what some of these were, and BAKED them into a cake? Taking a cue from the famous 'King Cake'???? Would it work?

As I was walking out of the office one night, I casually posed the question to my boss, "If you were to have Horcruxes, what would they be?"

He bit right on my trap, and proceeded to rattle off 4 right then and there. I repeated them over and over in my head until I got in my car, and furiously typed them into an email to my coworker while sitting in my car (9 degrees out, thank you very much!) He arrived at work the next day, and happily forked over two more for me to consider. Since I couldn't FIND these actual items, I did the next best thing and googled them and printed their images off on card stock. I found these nifty little 'jars' at Meijer in the travel shampoo section and I was set! Each Horcrux was neatly folded into a jar. Now, how to incorporate them into the cake??!!??

I made a double layer white cake (secret ingredient, buttermilk) with traditional buttercream frosting. I used food coloring, and swirled the batter once it was in the cake pans, to add a fun element of whimsy. I decided against baking plastic INTO the cake- I had no idea if the things I got would melt...and frankly, no time to test it.

One other new experience was the use of Fondant. I bought a box, opened it up, and there was this white, plasticky brick of edible goop? I read the directions, thought about what I wanted to make and went for it. I rolled vanilla into it, along with the food coloring, and basically molded it by hand into.... Harry's Broomstick! I think it's cute. I also made a Lightning Bolt, too.

It was getting late, so I had to limit my creativity. I placed the Horcruxes around the bottom of the cake, and piped red (it turned out quite pink) frosting around and over top of them.


As usual, my abilities are no match for my dreams. The cake looks like a child made it, but I don't care. I think the cake turned out delicious and the idea, Horcruxes and all, was a hit.
(I also only made 6 for him, forgetting that V had seven)


I also made a Birthday card out of the Marauder's Map, thanks to my friend Melissa over at Cake Hero!! She was kind enough to share her awesome file with me. She had an amazing Harry Potter party that you can check out HERE.


Charley was not interested in helping me make this cake, not after a fun day at DayCamp...instead my Sous Chef for this project was sweet, little Dakota.

Wednesday, December 15, 2010

Bacon! Bacon! Bacon!


Guest blogger: "Samson Sous Chef"

A few of my co-workers and I decided we needed to have a "bacon appreciation luncheon". Basically a pot-luck where every item must contain bacon. This was inspired by my watching the Food Network a little while ago and seeing a show on all the things one can do with bacon. Also, my buddy Pat's wanting to make something called a "bacon explosion". Google it. It's nuts.

Anyway, I chose to bake the bacon in the oven. It's easier to do large quantities that way.

The cooking bacon was driving Samson crazy!

Then I melted chocolate chips in a pan over very low heat.

When the bacon had drained on paper towels and cooled, I dipped the bacon in the chocolate and laid them on parchment paper to solidify.

They didn't look too appetizing, so I added some white snowflake decoratifs!

Sunday, December 12, 2010

WE ALL MAKE...EXCEPTIONS.


This time, it was for a friend of mine who is graduating (as of now, graduated) from Ohio State University today!
I used the Chocolate Recipe I tested last Saturday night, and then there was a request for Lemon Cake (Wheee!!! Yay!!!) so I went with my old trusty recipes! Here are some shots of the results! And of course, the dogs were hovering.

Saturday, December 4, 2010

PRACTICE MAKES PERFECT!


OK!!!!! I'mn suuuuper excited!!!!! WHY???? Because I have a BIG job coming up. Like, this coming weekend.

SOOOOOOO, I had to had to practice. The request is for some Chocolate Cupcakes, etc. I found this recipe for Choco cake and I had to give it a go!! And since I was feeling sassy, I made it a double layer cake instead!!

# 2 cups sugar
# 1-3/4 cups all-purpose flour
# 3/4 cup HERSHEY'S Cocoa
# 1-1/2 teaspoons baking powder
# 1-1/2 teaspoons baking soda
# 1 teaspoon salt
# 2 eggs
# 1 cup milk
# 1/2 cup vegetable oil
# 2 teaspoons vanilla extract
# 1 cup boiling water

# Heat oven to 350°F. Grease and flour two 9-inch round baking pans.

# 2. Stir together sugar, flour, cocoa, baking powder, baking soda and salt in large bowl. Add eggs, milk, oil and vanilla; beat on medium speed of mixer 2 minutes. Stir in boiling water (batter will be thin). Pour batter into prepared pans.

# 3. Bake 30 to 35 minutes or until wooden pick inserted in center comes out clean. Cool 10 minutes; remove from pans to wire racks. Cool completely

I had to...I mean HAD TO. Make my Butterfinger Buttercream for this test. It was required.
You can find the original post for the recipe HERE.

Two sticks of butter
4 cups powdered sugar
6 fun size Butterfinger candy bars
two tablespoons of peanut butter
a sploosh of milk

I creamed the butter and added the butterfinger bits that I had already broken up, and continued to whip in my mixer. I then added the sugar, and since it was all looking a bit dry I whacked in about two tablespoons of peanut butter and splooshed in about 1/4 cup of milk. PERFECTION.


needless to say, I'm quite happy with the results........ MMMmmmmmmmm.

Saturday, November 27, 2010

GONUTS FOR DONUTZ


HI!

I had all of the regular stuff planned for Thanksgiving as far as dessert goes, but I decided that I would test out this cute little donut pan I bought on a whim a few weeks ago....

I had also starred this RECIPE from Sprinkle Bakes that I wanted to give a try. Her photos and tutorial are AWESOME. They made it super easy for me to give this a shot.

Doughnut batter:

2 cups all purpose flour, sifted
3/4 cup granulated sugar
2 tsp. baking powder
1/2 tsp. salt
3/4 cup buttermilk
1 tsp. vanilla extract
2 eggs, lightly beaten
2 tbsp. butter, melted
Seeds from one vanilla bean (this is what I was missing :C)

Preheat oven to 425°F. Spray donut pan with nonstick cooking spray.

In large mixing bowl, sift together all purpose flour, sugar, baking powder and salt. Add buttermilk, eggs, vanilla extract, vanilla seeds and butter and beat until just combined. Spray doughnut cavities with cooking spray or brush with butter. Fill each donut cup approximately 1/2 full.

Bake 5-8 minutes or until the top of the donuts spring back when touched. Let cool in pan for 4–5 minutes before removing. Finish doughnuts with vanilla glaze. Doughnuts are best served fresh.


Vanilla glaze:

1 cup confectioner’ s sugar
1 tbsp. milk
½ tsp. vanilla extract
4 drops of liquid blue food coloring (I used pink, duh!)
White nonpareils

In small bowl, stir together sugar, milk and vanilla extract until sugar is completely dissolved. Add food coloring and stir until color is uniform. Use immediately to glaze doughnuts. Sprinkle on nonpareils.
I had everything for the recipe, except the Vanilla Beans- which may have been the Pontiac Game Changing Difference here, as they were super cute, but tasted very flour like.

Either way, they were really easy, the glaze was fun, and a cute and exciting update to the gal who bakes a zillion cupcakes in her day!!!

BUTTERNUT SQUASH SOUP


I woke up this morning, and thought about what I could do with a bunch of the leftover ingredients we had in the fridge from Thanksgiving....

Easy Butternut Squash Soup

1/4 tsp. minced garlic
2 tablespoons of butter
2 cups of Butternut Squash- cubed
2 cups of cubed potatoes
**additional veggies that would be good that I didn't have laying around- celery and onion
2 cups Chicken Stock
1/2 cup of heavy whipping cream
1/2 cup buttermilk
1 tsp ground Cinnamon, Nutmeg and Clove spices- i just used a dash
1/4 cup light brown sugar (this must have been that sweetness factor!)
sea salt and fresh ground pepper

(my measurements are all approximated, as I just whacked it all together and tasted as I went.)

Brown butter, garlic and squash (you would also add the celery and onion if you go this route)
add chicken stock, potatoes, and both milks (probably one of the two would work here, I just had both so I used them!)
add sea salt, pepper, brown sugar, cinnamon, nutmeg and clove (just a dash, mind you)
bring to a boil, reduce heat and cover and let simmer for 45 minutes, stirring occasionally.
(it might look a little crazy at this point- don't worry. You may see separation, like the butter rising to the top, don't worry! We'll fix it!)

When potatoes/squash are "mushy" transfer the contents to a blender or food processor and puree.
placed pureed mixture back on the stove (IN THE POT, DON'T BE SILLY), stir it up and it's ready to serve!!!

The soup turned out a LITTLE on the sweet side, so I garnished it with a sprinkle of paprika and it was ready to go!

Chahhhhley, as you can see, is wiped out from all of the Holiday Hooplah!

Sunday, September 26, 2010

FALL IS TIME FOR...CHANGE.


WOW. I cannot believe it's time for Summer to end and Fall to arrive. Before I start stacking up the posts about Pumpkin goodies and Pecan Pie, and then GASP! Christmas Cookies...I thought I would do a small Lemon Round-up. This past summer i declared a love for all things lemon...even Charley got into it and opened his very own Lemonade stand!!!

LEMON VANILLA SUGAR COOKIES

1.5 cups O'butter
2 cups of white sugar
4 eggs
1 teaspoon of Vanilla Extract
3 teaspoons (oh, who am I kidding, It was probably like 4-5) of Lemon Emulsion
5 cups of white flour
2 teaspoons of baking POW-dah
1 teaspoon of salt

In a large bowl, mix all dry ingredients together, set aside
Beat the butter and sugar until smooth
add in the eggs, one at a time, alternating with the vanilla and lemon emulsion
slowly add in the dry mixture until blended.

leave in the fridge for at LEAST two hours.
They were delicious- and totally inspired by THIS!
Bake at 400 degrees for 6 minutes a sheet.


LEMON CURD:
3 large eggs- room temperature
Juice from 2-3 lemons, about 1/3 cup (room temp. lemons give more juice!)
1 tablespoon lemon zest
3/4 cup white sugar
4 tablespoons room temperature unsalted butter

DO THIS!
In a stainless steel bowl placed over a saucepan of simmering water, whisk together the eggs, sugar, and lemon juice until blended. Cook, stirring constantly, until the mixture becomes thick- about 10 minutes. Remove from heat and immediately pour through a strainer to remove any lumps. Cut the butter into small pieces and stir into the mixture until the butter melts. Add in the lemon zest and let cool. The lemon curd will continue to thicken up as it cools down. Cover immediately (so a skin doesn't form) and refrigerate for up to a week.

**I have used this recipe to make lime and grapefruit curd as well.

LEMON BUTTERCREAM FROSTING

1 cup butter- room temperature
31/2 cups of powdered sugar
1 tsp vanilla
1/8 tsp salt (sometimes less!)
juice from 1-2 Lemons
lemon zest
beat butter and sugar first
add in other ingredients and beat until light and fluffy

Sunday, August 29, 2010

NOBODY had better lay a finger on my...


BUTTERFINGER!

Yep. You guessed it, I made Butterfinger cupcakes. DEElishussss!!
Boyf ate two of them before I even finished frosting them all!

I apologize for having to use my camera on my phone. My real camera is totes deadsville right now, so BOO on that.

I used a Devil's food cake mix for the cake...put some crushed up Butterfinger chunks inside the cake and baked 'em up. Are those MONKEY cupcake liners, you ask? Yes. Yes they are.

The FROSTING is where the amazingness started to happen:

Two sticks of butter
4 cups powdered sugar
6 fun size Butterfinger candy bars
two tablespoons of peanut butter
a sploosh of milk

I creamed the butter and added the butterfinger bits that I had already broken up, and continued to whip in my mixer. I then added the sugar, and since it was all looking a bit dry I whacked in about two tablespoons of peanut butter and splooshed in about 1/4 cup of milk. PERFECTION.

The dogs could have cared less about my baking, as they were glued to the window staring at the feral cat standing outside of our fence. Silly cat.

I took Char to a training seminar last weekend, happened to pop over to the site to check out other dog training stuff, and there we were, featured on the dog trainers blog! How FUN! Charley did a good job! Check out the post below:

LINK TO CHARLEY

Tuesday, August 3, 2010

HAPPY BIRTHDAY YODA!!!!


OK. So, for the last ten years or so, I have tortured my sister with a simple, silly ongoing joke. I started telling my sister that "she looked like Yoda" on a rainy day, locked in the sun room at my grandmother's house, watching...you guessed it! Return of the Jedi!!

It seemed only fitting that when she made a request for a birthday baked good, I delivered a lovely Yoda cookie. My only regret is that I didn't make more...we were at my parent's house, and it was HOT! So hot that you can see poor Yoda sweating in his frosting face! It was also SO hot that Charley just slept right through the baking!!

**my sister is an amazing, beautiful lady- she of course, looks nothing like Yoda. She is a babe!

I used a new recipe this time that, well, just isn't worth sharing. The best thing I discovered was the neon food coloring gels that provided Yoda with his killer green skin!

Saturday, July 17, 2010

LEMON BUTTERCREAM DREAM

HI!
wow, it HAS been a while. I have bad news, my camera is just about deadsville- but I have GOOD news, too! For the first time ever, CharleySousChef has a video to showcase the tasty cupcake! Starring silly old Keith Regular Hill.

I used THIS recipe for the FROSTING! MMmmmmmmmm!

1 cup butter- room temperature
31/2 cups of powdered sugar
1 tsp vanilla
1/8 tsp salt (sometimes less!)
juice from 1-2 Lemons
lemon zest
beat butter and sugar first
add in other ingredients and beat until light and fluffy

...and I used the old Box Cake plus buttermilk trick...DEEEE-licious!


..and if that didn't work, try THIS.

Friday, July 2, 2010

You've Got the Love...

OK, wow! I was excited when my pal, Meaghan, over at the Decorated Cookie, sent a little L-O-V-E my way!!!

Check it out HERE!!!!

AND AND AND!!!! The major Cupcake Blog aggregate, "Cupcakes take the Cake" posted my Dog + Cupcake submission!

HERE!!

<3 <3 <3 <3

Saturday, June 5, 2010

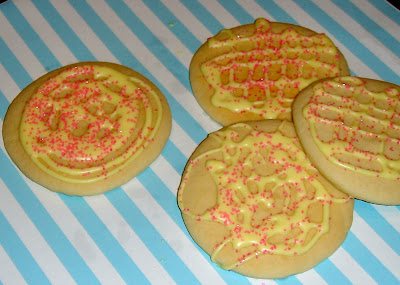
VANILLER' AND LEMON SUGRA' COOKY'S!


OKAY dokay! The time has come for me to test out my suspicions on this wonderful ingredient known as, "Lemon Emulsion." For those of you who know me, or know my baking habits, know full well how I have been OB-sessed with LEMON ev-ah-ree-ting all spring long.

My favorite Blog got me started on Emulsions with these buggars!

Today, I made my Old Trusty Sugar Cooky Recipe with the following adjustments:

1.5 cups O'butter
2 cups of white sugar
4 eggs
1 teaspoon of Vanilla Extract
3 teaspoons (oh, who am I kidding, It was probably like 4-5) of Lemon Emulsion found here
5 cups of white flour
2 teaspoons of baking POW-dah
1 teaspoon of salt

In a large bowl, mix all dry ingredients together, set aside
Beat the butter and sugar until smooth
add in the eggs, one at a time, alternating with the vanilla and lemon gunkmulsion
slowly add in the dry mixture until blended.

The bummer of it all....leaving in the fridge for at LEAST two hours!! Gah!
I have a good feeling that these ones will actually taste lemony- NOT like these did.

Bake at 400 degrees for 6 minutes a sheet.

HOLY CATS they taste AWESOME!!!!!!!!!
...did I mention that I need a new camera??!!?? I might as well have drawn the cookies on this post with a Crayon! What Camera should I set in my sights to get.....?

Monday, May 31, 2010

Cupcakes: Coco-Nutz!


Okay, so I tried to get all clever and use Photoshop to juice up this post, but I ran out of focus and here we are. :) Plain old boring photos.

Charley and I were bummed to wake up to Thunderstorms today- but not as much as Boyf, who had grand plans to gorf with a pack of dudes. I have also been packing in the golfing opportunities, so I took this mornings storm as a sign that I needed to bake something.

I recently bought a new cookbook, "Hello, Cupcake!" and in the back of the book, they list ways to spice up boxes of cake mix. I happened to have a spare white cake mix handy, so I grabbed that and went to work. They ask you to do the following:

White cake mix (really any cake mix)
1 cup of buttermilk (replaces any water the recipe calls for)
vegetable oil (what box tells you to add)
and then one additional egg (usually it's the fourth)


The cake tastes great and baked up really nicely, so I think I will be doing this from now on- unless I am in a buttermilk void. :/

I decided to make...

Coconut Buttercream frosting:

1 Cup of butter
3.5 cups of powdered sugar

2 teaspoons of coconut extract

2 teaspoons of coconut milk
beat in mixer until fluffy


I topped each one of the buggers with a "Coconut Toupee" of pink sweetened coconut. Coloring the shreds was MUCH easier then I thought- as I found some really useful directions on the interwebz:

Grab a small Gladware container
put a few drops of food coloring into the container
shake it up BEFORE adding the coconut

add the coconut and shake it up some more!

Voila! Pink Toupees for my cupcakes. :P


By the time Charley and I were done, the sun was out for a great, hot, Memorial Day 2010!

Sunday, May 2, 2010

Charley Ball!

A Herd of Racookies!!!


Okay, so Charley and I had our first gig. Our assignment was to bake 70 Raccookies for a golf outing yesterday (which was canceled due to the weather). I baked my favorite sugar cookie recipe, and changed two things to see if I could improve on something tasty- I sifted the sugar and added Almond Extract in addition to the Vanilla. I read about adding almond on one of my fave blogs, The Decorated Cookie. Let's just say it was a good decision because they smelled and tasted super.
I learned a LOT from this cooking adventure.
  • There's gotta be an easier way, and I'm determined to find out what it is.
I was too chicken to try and make these cookies using Royal Icing. I tried a test batch last Sunday, and let's just say the icing looked more like school paste then frosting. I found out that I added too much powdered sugar..but I COULD have corrected it by adding more water. Next time.
For these Racookies, I sketched out the little buggers using a black food writing pen (free hand, using my cardboard cookie template as a guide). I then painstakingly frosted them with black icing, and used a toothpick (yes, I said TOOTHPICK) to paint the icing to match the outline. Last, I fished out all of the white hearts, flowers and stars from my stash of sprinkles and placed each eyeball in it's spot with tweezers. Gah!
All in all, you are looking at about 14 hours of work from start to finish. So when I say there's got to be an easier way- I have to believe that it's true. Charley sat by my stool (as pictured) for pretty much the entire cookie tornado.
I'm adding more pics then usual, because who knows when I'll be making this many cookies again :). Even though the outing was canceled, cookies were delivered and Boyf and I played a round of golf anyhow. It didn't rain on us one bit. :) Yay!

Thursday, April 29, 2010

A NEW LOOK!


I was lucky enough to have a friend willing to help me make a COOL logo for this here blog. His name is Joe Kinney (aka Mouse!), and you can peep out some of his work here!
Look at what he put together for me and old Chuck!!!